
Are you lucky enough to enjoy the daily visits of a hummingbird in your garden? Have you bought a specialized feeder for it and do you want it to be in perfect condition at all times? Let us show you how to clean a Hummingbird feeder
As with other domestic animals that require our constant care to feed and stay healthy, having a hummingbird feeder in perfect condition is key to ensuring not only that the bird can feed properly, but also that it stays healthy and does not ingest bacteria present in the feeder due to lack of proper maintenance.
HOW TO CLEAN A HUMMINGBIRD FEEDER
Contents
WHAT DO WE NEED?
- Soap to clean the dishes without artificial aromas
- Small cleaning brush
- Quality Cleaning Mop
- Rice
- Cube
STEP 1: EMPTY AND WET THE TROUGH
The first thing we should do when we notice that the feeder is dirty and the nectar is starting to spoil, is to empty it completely and fill it with hot water. It is important that we never try to reuse the nectar, especially if we live in a place with a warm climate. Doing so could start to decompose the nectar and generate bacteria. Both are harmful to the health of the hummingbird that will come to drink it.
The best way to prevent the nectar from accumulating and being wasted is to adjust the amount we put in the tank. Try putting various amounts of nectar in, to find out how quickly the birds empty it. You want to find an amount that the birds empty on a regular basis, but not so much, the nectar starts to spoil before it is empty. This way we can avoid the issue of rot.
STEP 2: DISASSEMBLE THE TROUGH
Firstly, ensure it is all empty, then we can proceed to dismantle our food dispenser as much as possible. In the past these feeders were very robust and difficult to clean. Nowadays the new models, will allow us to dismantle all the parts ( including the feeding ports and the protections against the bees), so we can clean each part separately.
STEP 3: CLEAN WITH SOAP AND WATER
Now we have everything well disassembled, we must mix hot water and the cleaning soap that we have chosen. Place it in a large container that allows us to create a solution where we can immerse the pieces of the trough. When the container is full, submerge the pieces of the trough and leave them soaking for 1 to 2 hours. This way all the dry nectar pieces embedded in the walls of the trough, will loosen up and be easier to remove later.
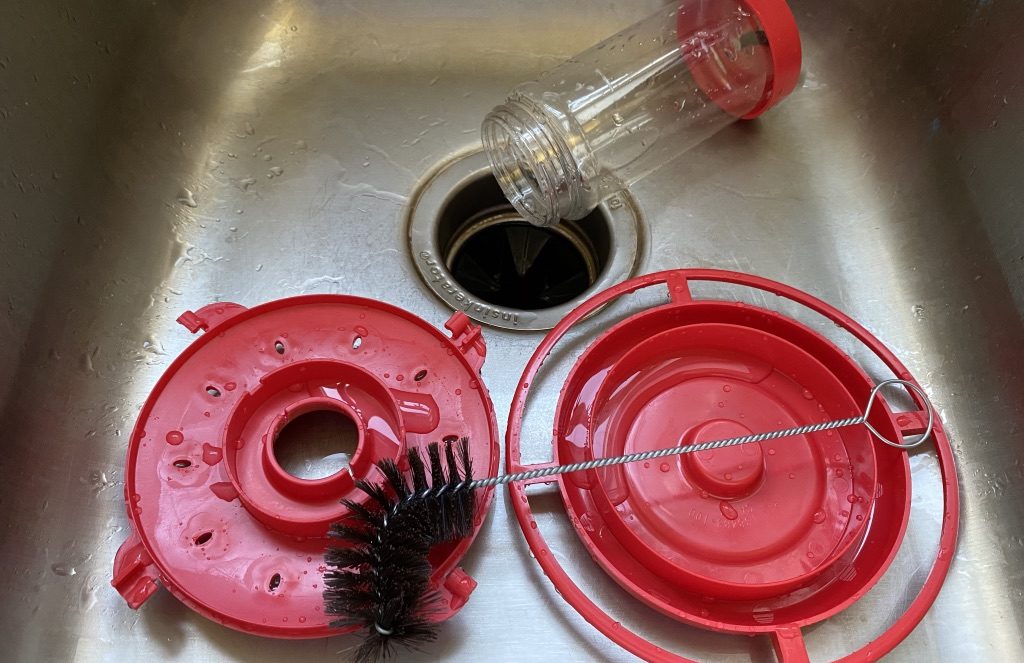
STEP 4: DEEPLY SCRUB THE TROUGH
After soaking all the pieces of the trough for two hours, start to scrub it deeply. Using a mop or a cleaning brush that can fit in the bottle, rub the sides and be sure to remove any mold, stains or nectar remains, dry or encrusted, that may have been trapped.
It is possible, the bottle in the trough has too narrow a neck and does not allow access for any brush to clean it. Instead, try an indirect cleaning method, with a handful of rice.
- Put a spoonful of rice mixed with a little detergent into the bottle.
- Fill 3 / 4 full with hot water and shake the contents.
- Rinse.
- Repeat if necessary.
STEP 5: RINSE
After you have thoroughly scrubbed all the parts, empty the cleaning solution. Rinse everything with cold water, under pressure, to remove any traces of foam or dirt.
STEP 6: DRYING
Having scrubbed and rinsed the trough thoroughly, let it dry properly. Leave all the pieces to dry separately on a towel or dry cloth and wait until they are completely dry. Reassemble the trough.
AND THAT’S IT! OUR HUMMINGBIRD WILL BE ABLE TO ENJOY ITS NECTAR AGAIN WITH COMPLETE PEACE OF MIND!